01
Open your workspace
Create an account or sign in, then move straight into the workspace where the job list and drawings live.

Follow the standard workflow from plan upload to a bill of quantities ready for pricing.
Create an account or sign in, then move straight into the workspace where the job list and drawings live.
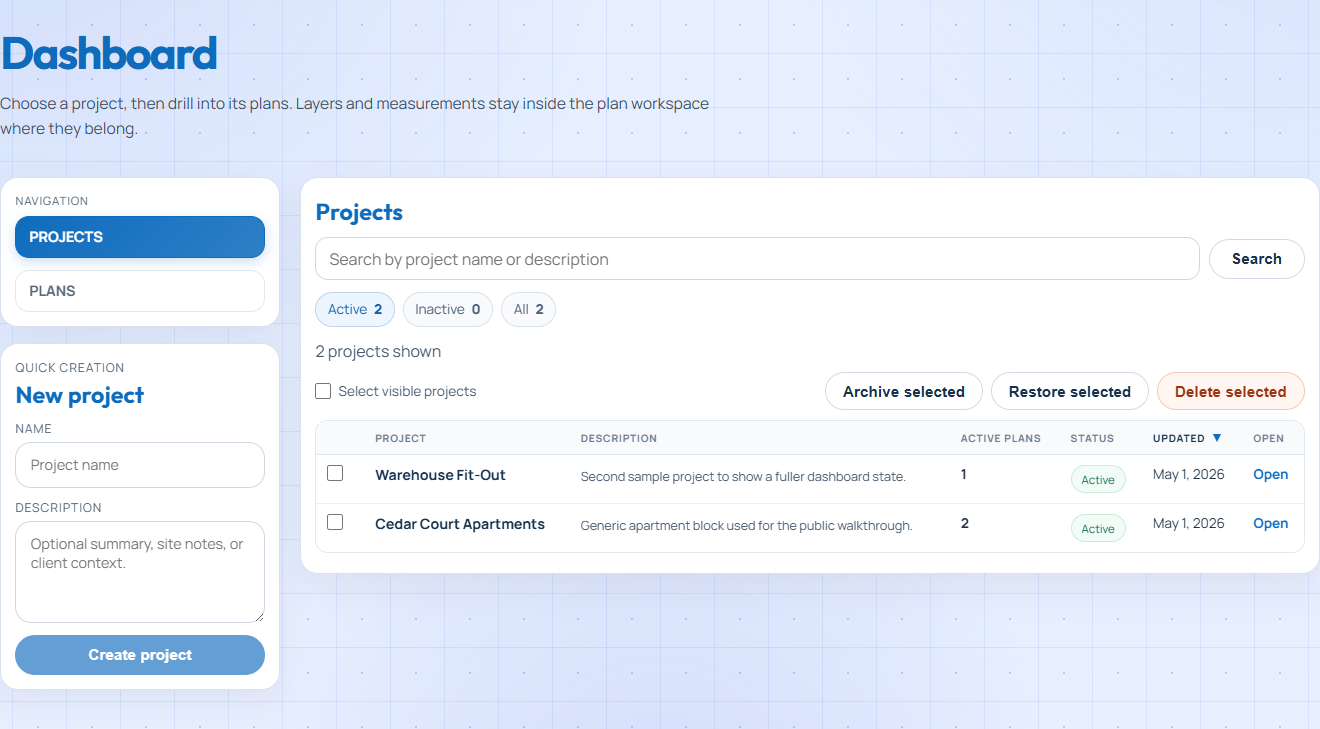
Add projects and keep active quoting work organized in one place.
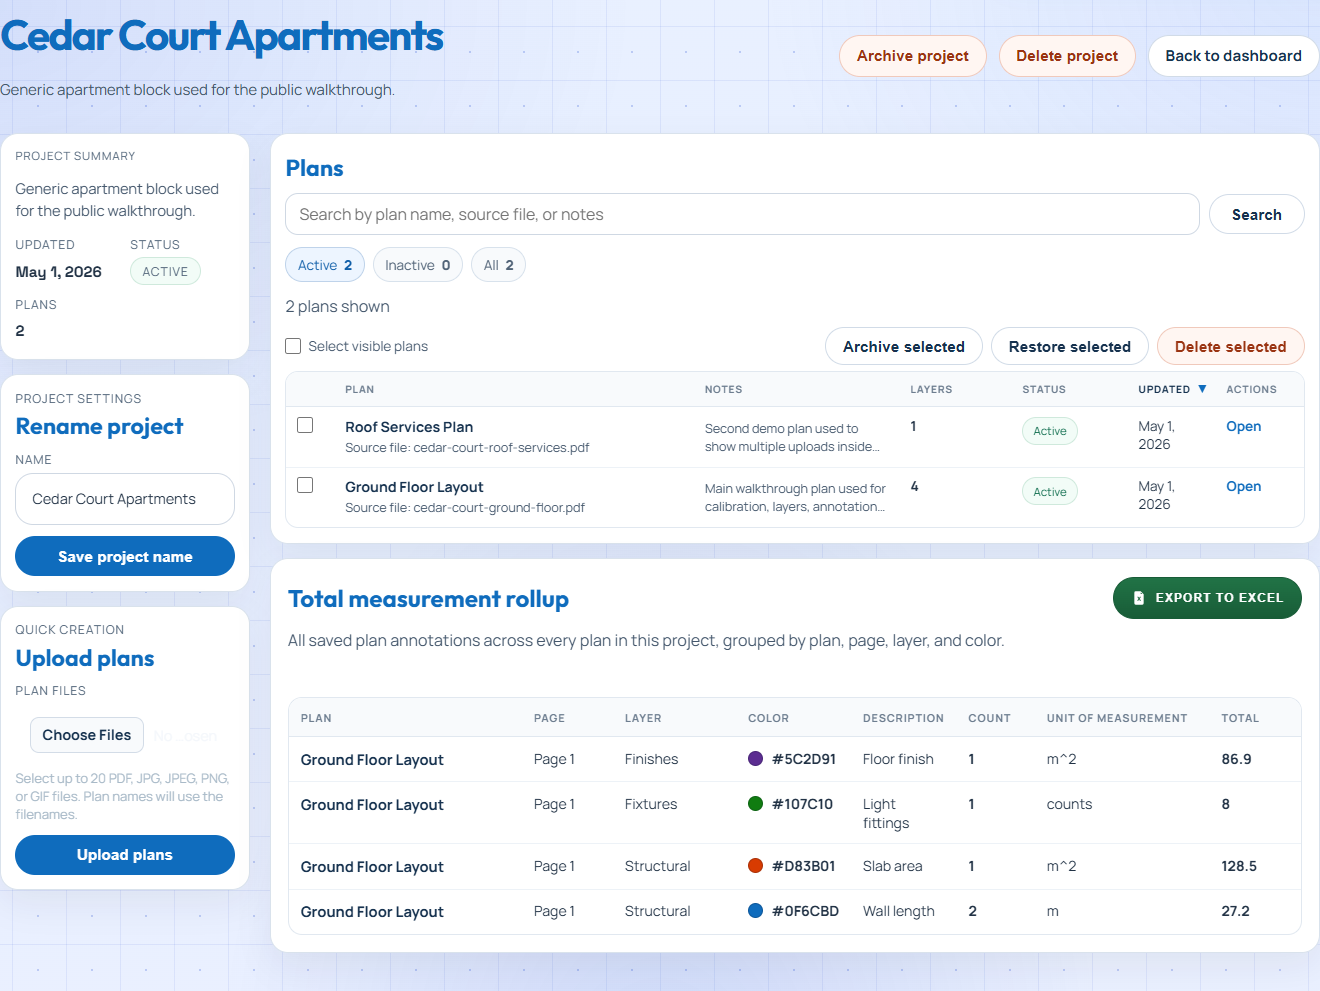
Open a project, upload one or more plans, and keep the active drawing set together.
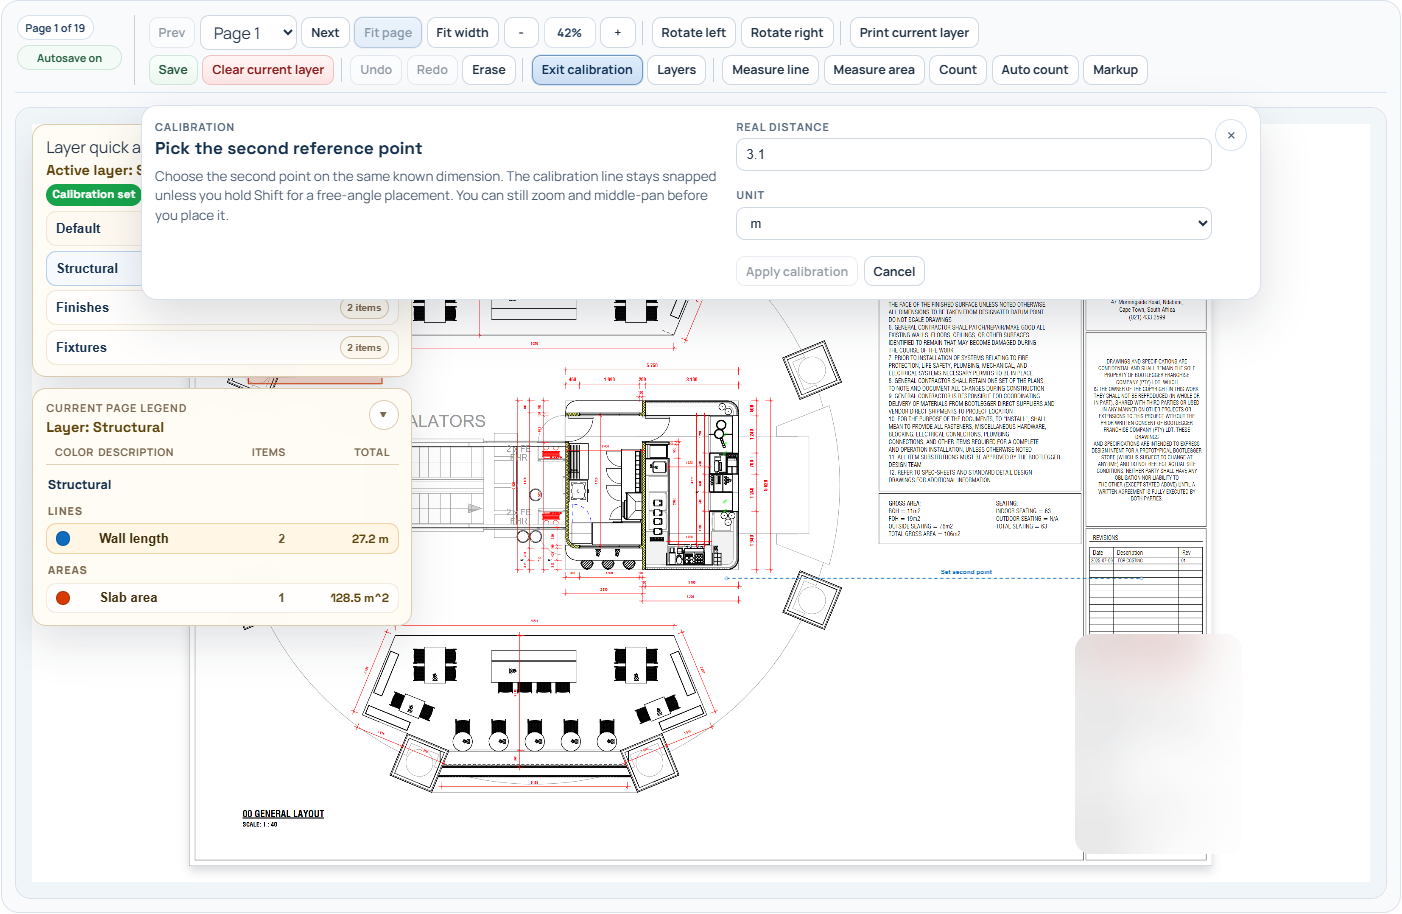
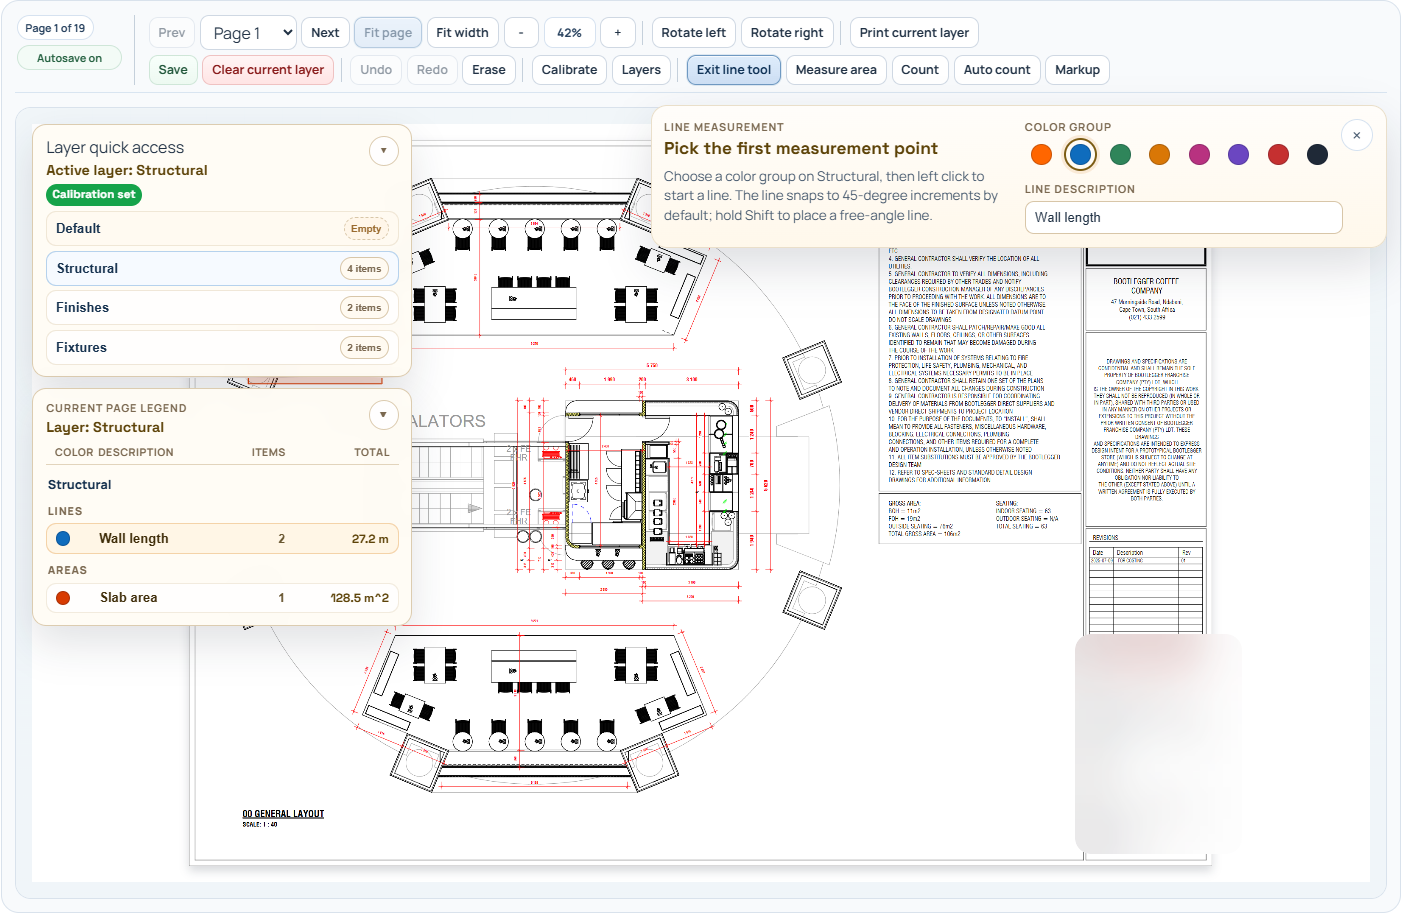
Open a plan, choose two known points, and apply the scale before measuring.
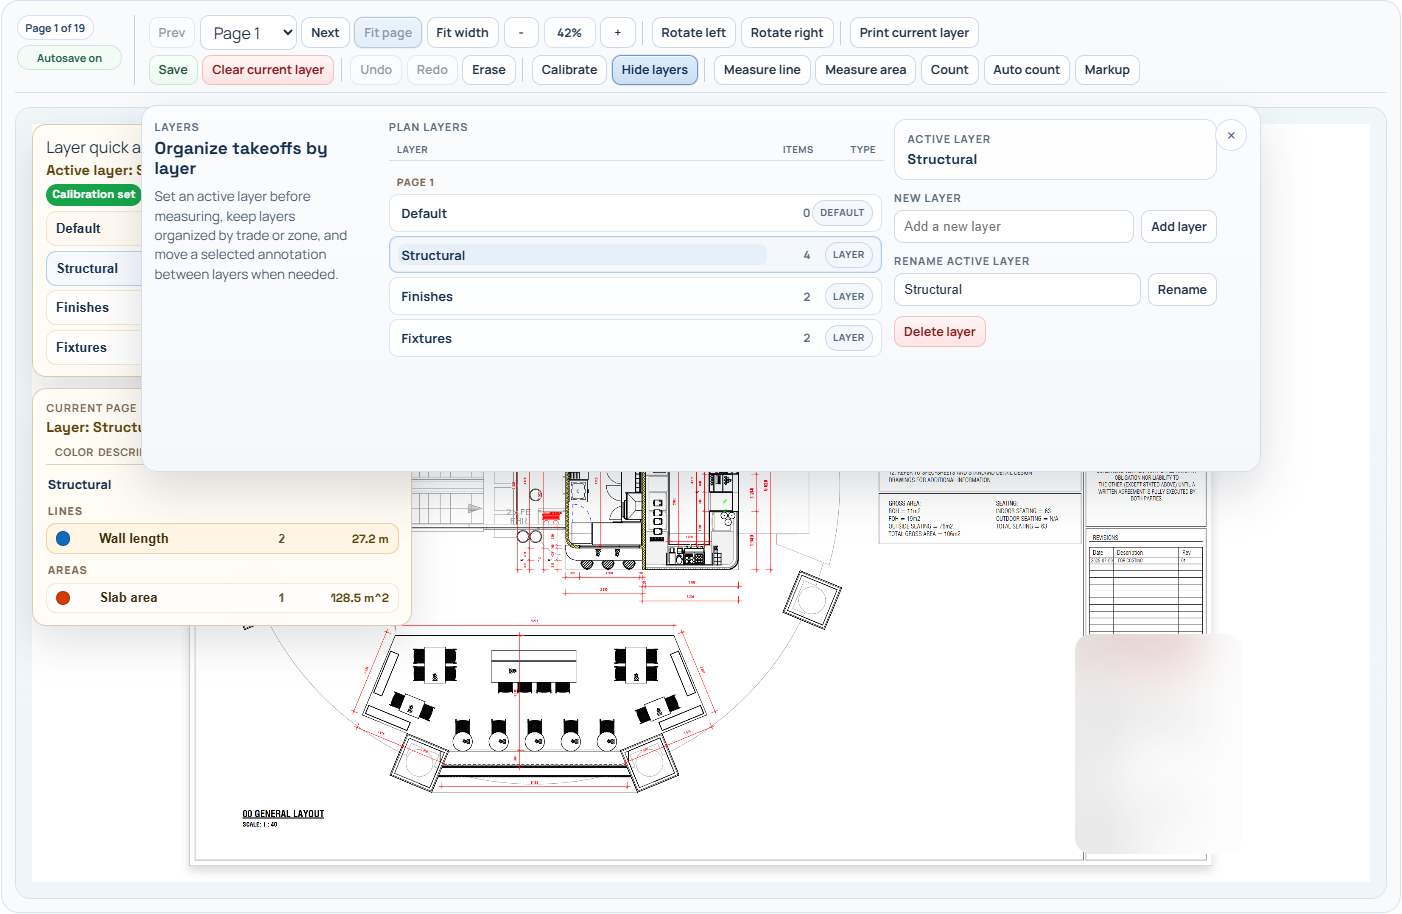
Create layers so trades, areas, circuits, or scope packages stay grouped cleanly.
Use line, area, count, and auto count tools to capture the quantities you need directly on the plan.
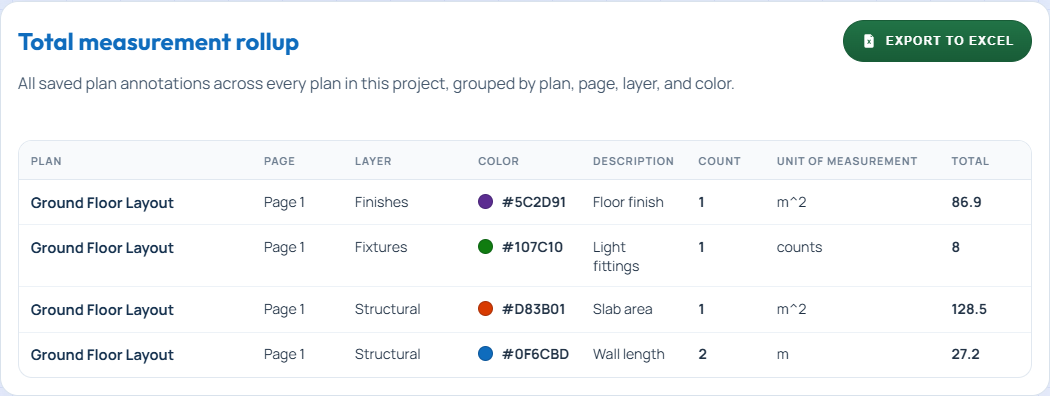
Review saved measurements across the job, then export the roll-up as a bill of quantities for pricing.
A quick reference for navigating and measuring once the job is ready for takeoff.
Scroll the mouse wheel up to zoom in and down to zoom out.
Hold the middle mouse wheel button and drag to move around the plan.
Click to start, add each corner point, then double-click to record the total length.
Click each corner of the shape, then double-click to close and record the area.
Click once on each item you want to count. Each click adds one to the total.
Circle one example, then adjust the matching threshold until the result looks right.
Hold Shift while clicking when you need to draw without 90° and 45° snapping.
Separate trades, circuits, areas, or scope packages so annotations stay organized.
Measurements feed the plan legend and combined project roll-up automatically.
Start with a monthly plan and test the complete workflow during the free trial.
Open the short demo to watch the standard upload, calibration, layer, and measurement flow in one pass.
This action cannot be undone.